I’ve been working on updating the Pippa Toque pattern over the last few days. It was one of my first patterns so it left a bit to be desired, including being worked in a yarn that had been discontinued. I thought it might be a good idea to clean it up a bit, work up a new sample in a current yarn, and put it into my new pattern layout.
I also decided that I didn’t need to include the photo tutorial for the pompom in the pattern. Instead, I’m now going to put the tutorial up here so that it can be accessed by anyone. I can now include a link in my patterns to the tutorial. Easy peasy!
Making a pompom is also easy peasy. Check it out…

Pull a long strand of each colour of yarn from the balls and hold together, laying across your fingers.
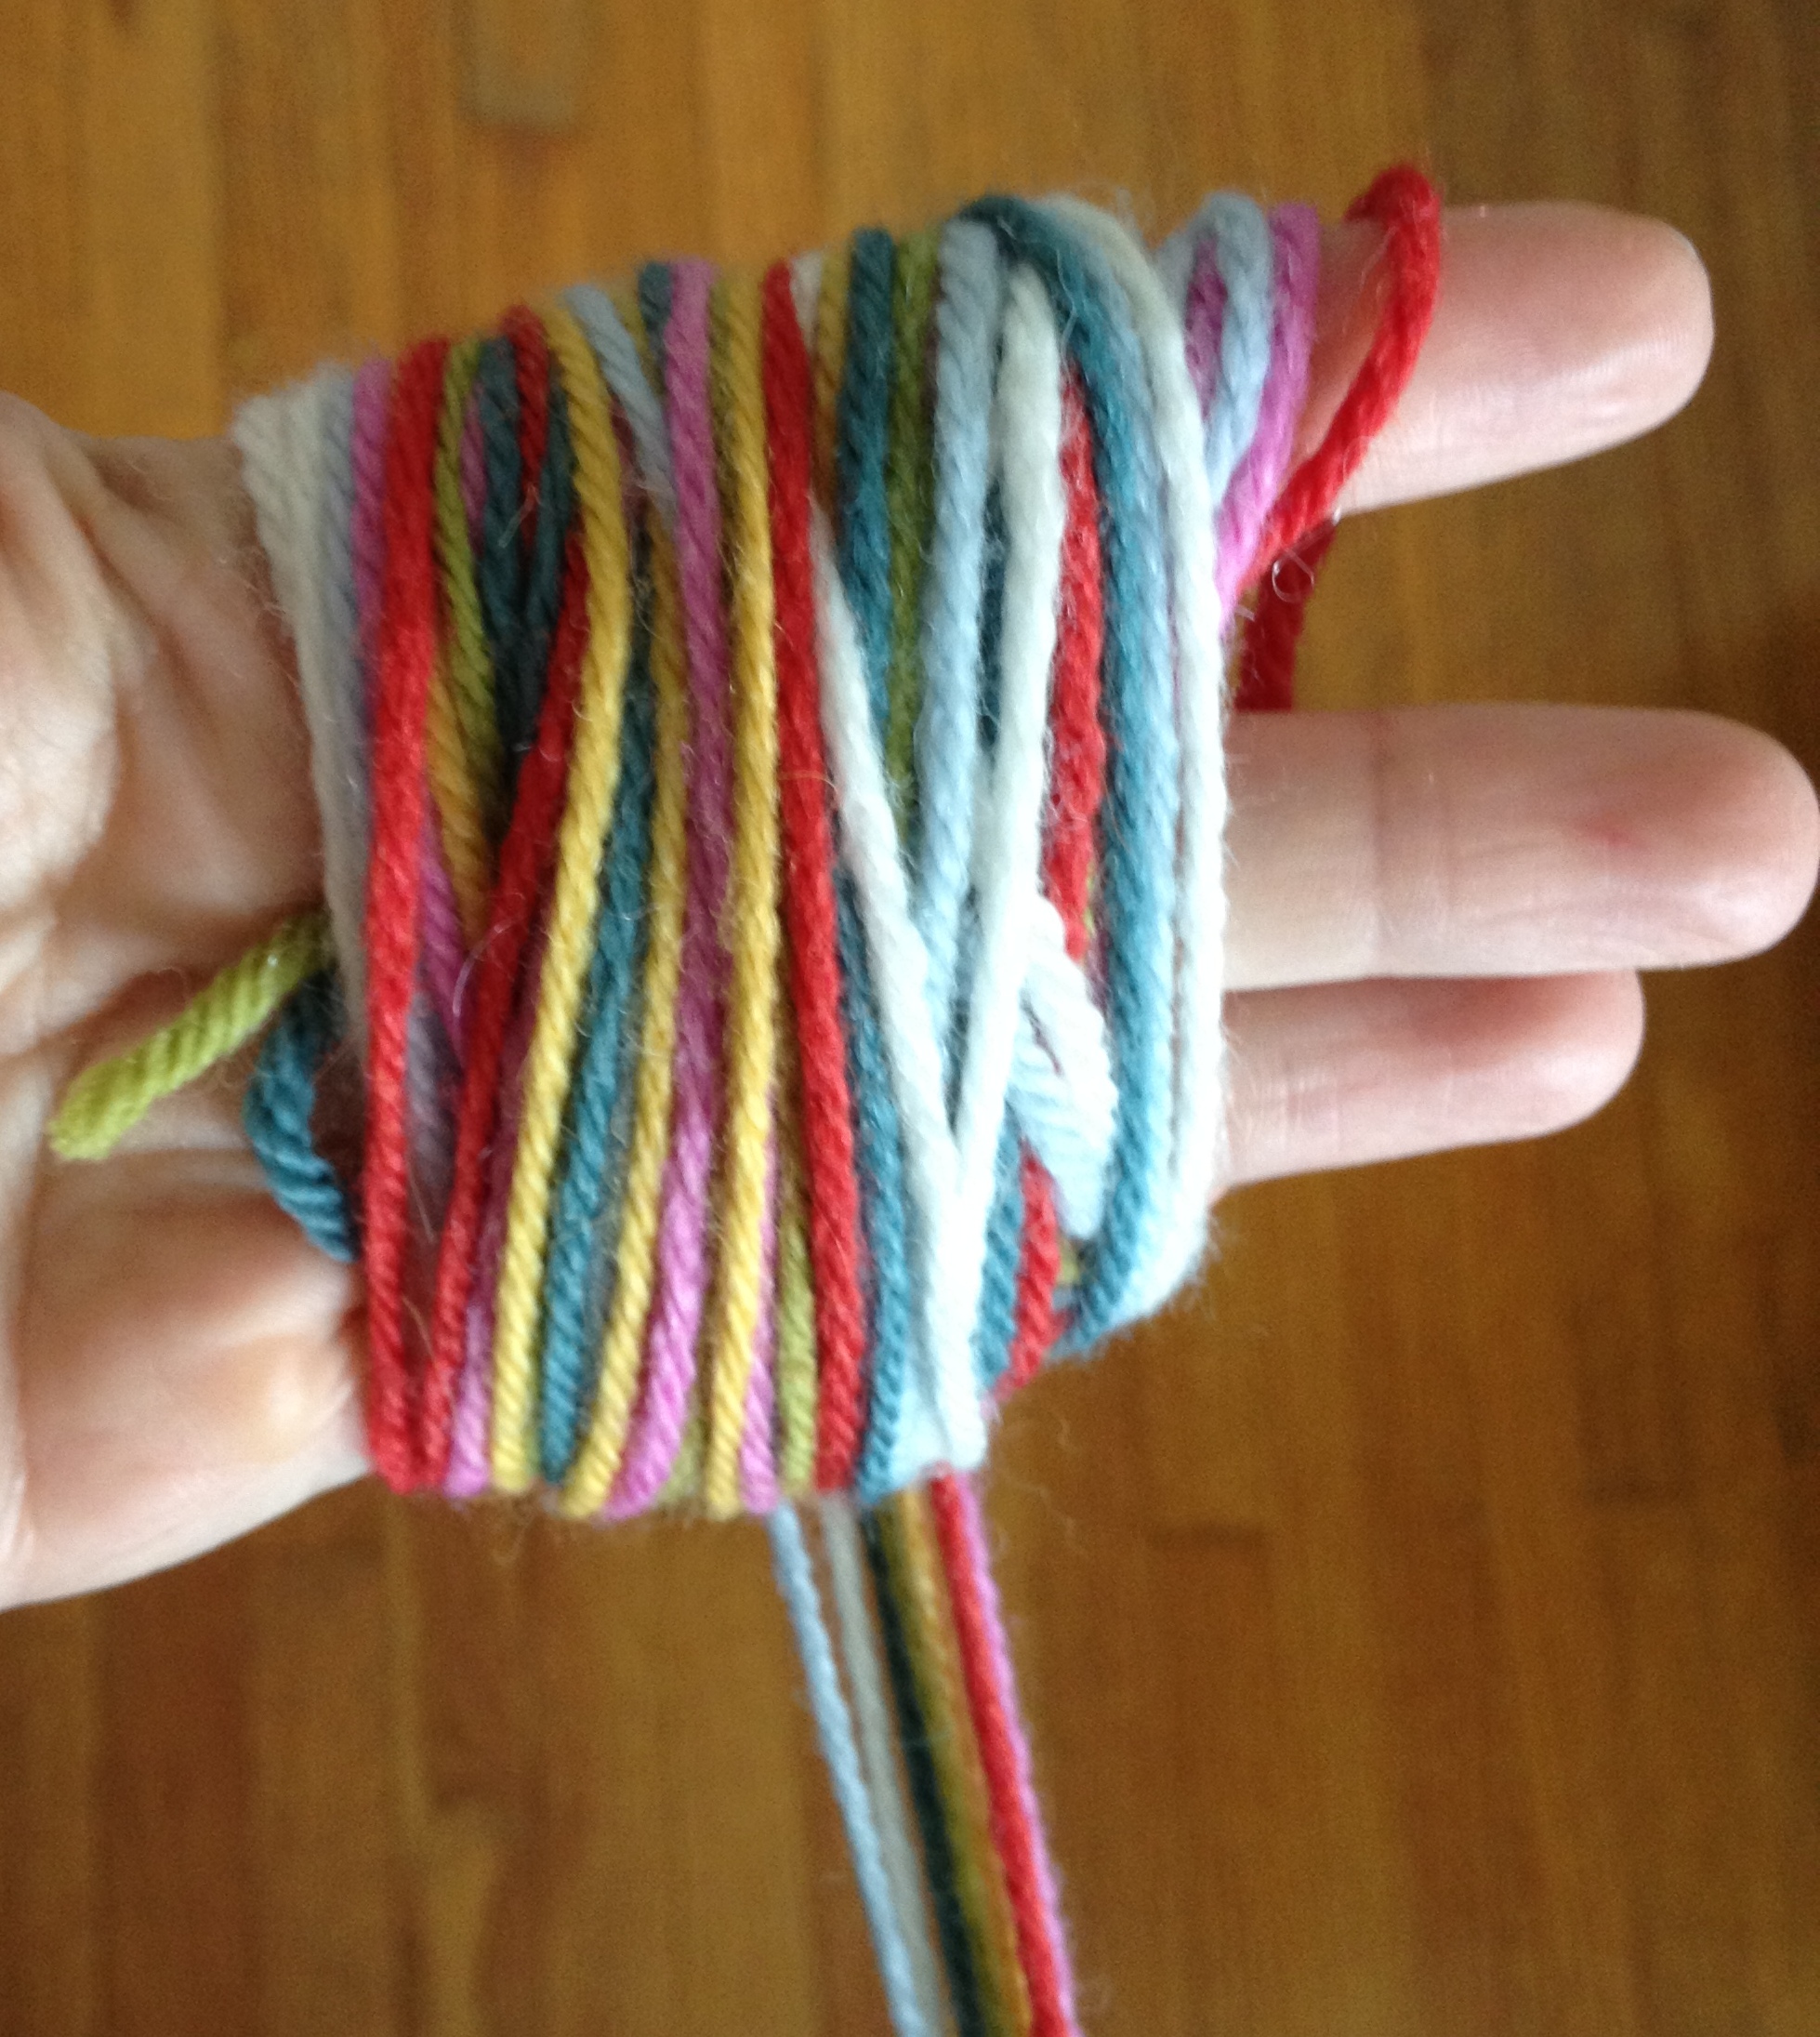
Wind around your fingers 15 to 20 times. (If you’re only using one colour you’ll want to do more like 100 wraps).

Cut a 12″ length of yarn. Push one end between your middle two fingers, wrap around the strands at the center and tie very tightly.
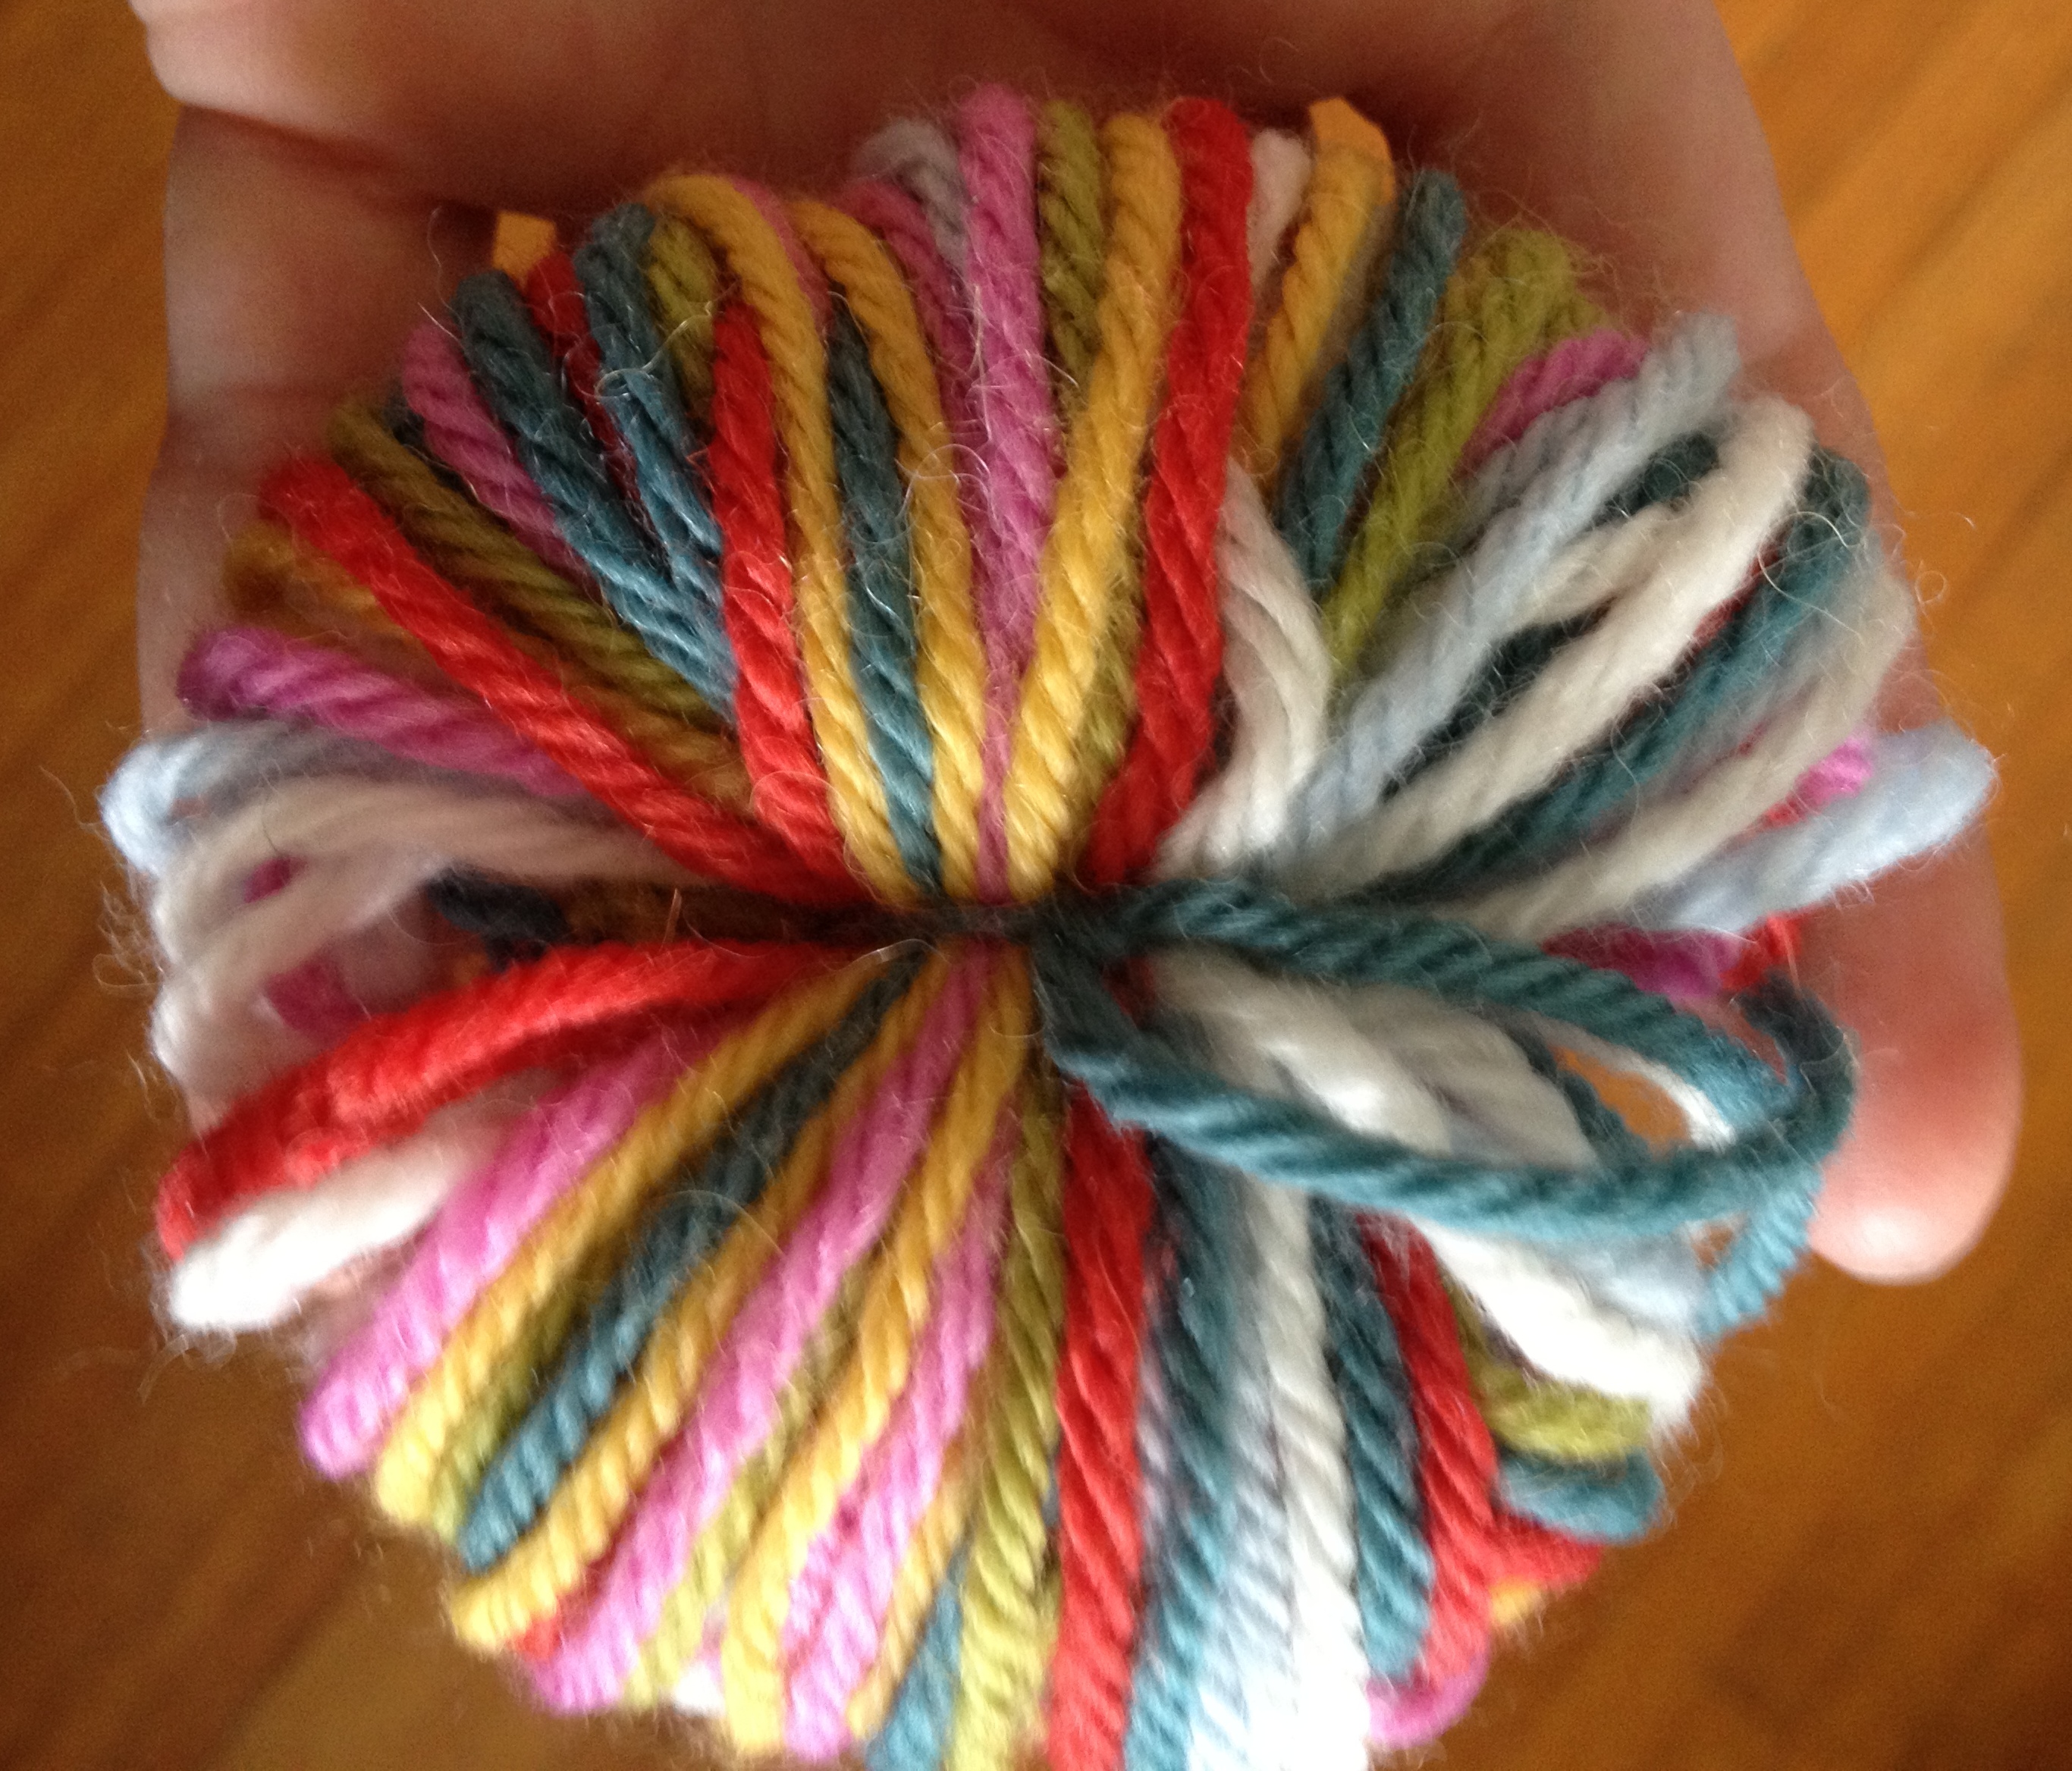
Do not cut off ends of this tie.

With sharp scissors, cut through the center of the loops on either side of the tie.

The resulting pompom will be a little messy and uneven.
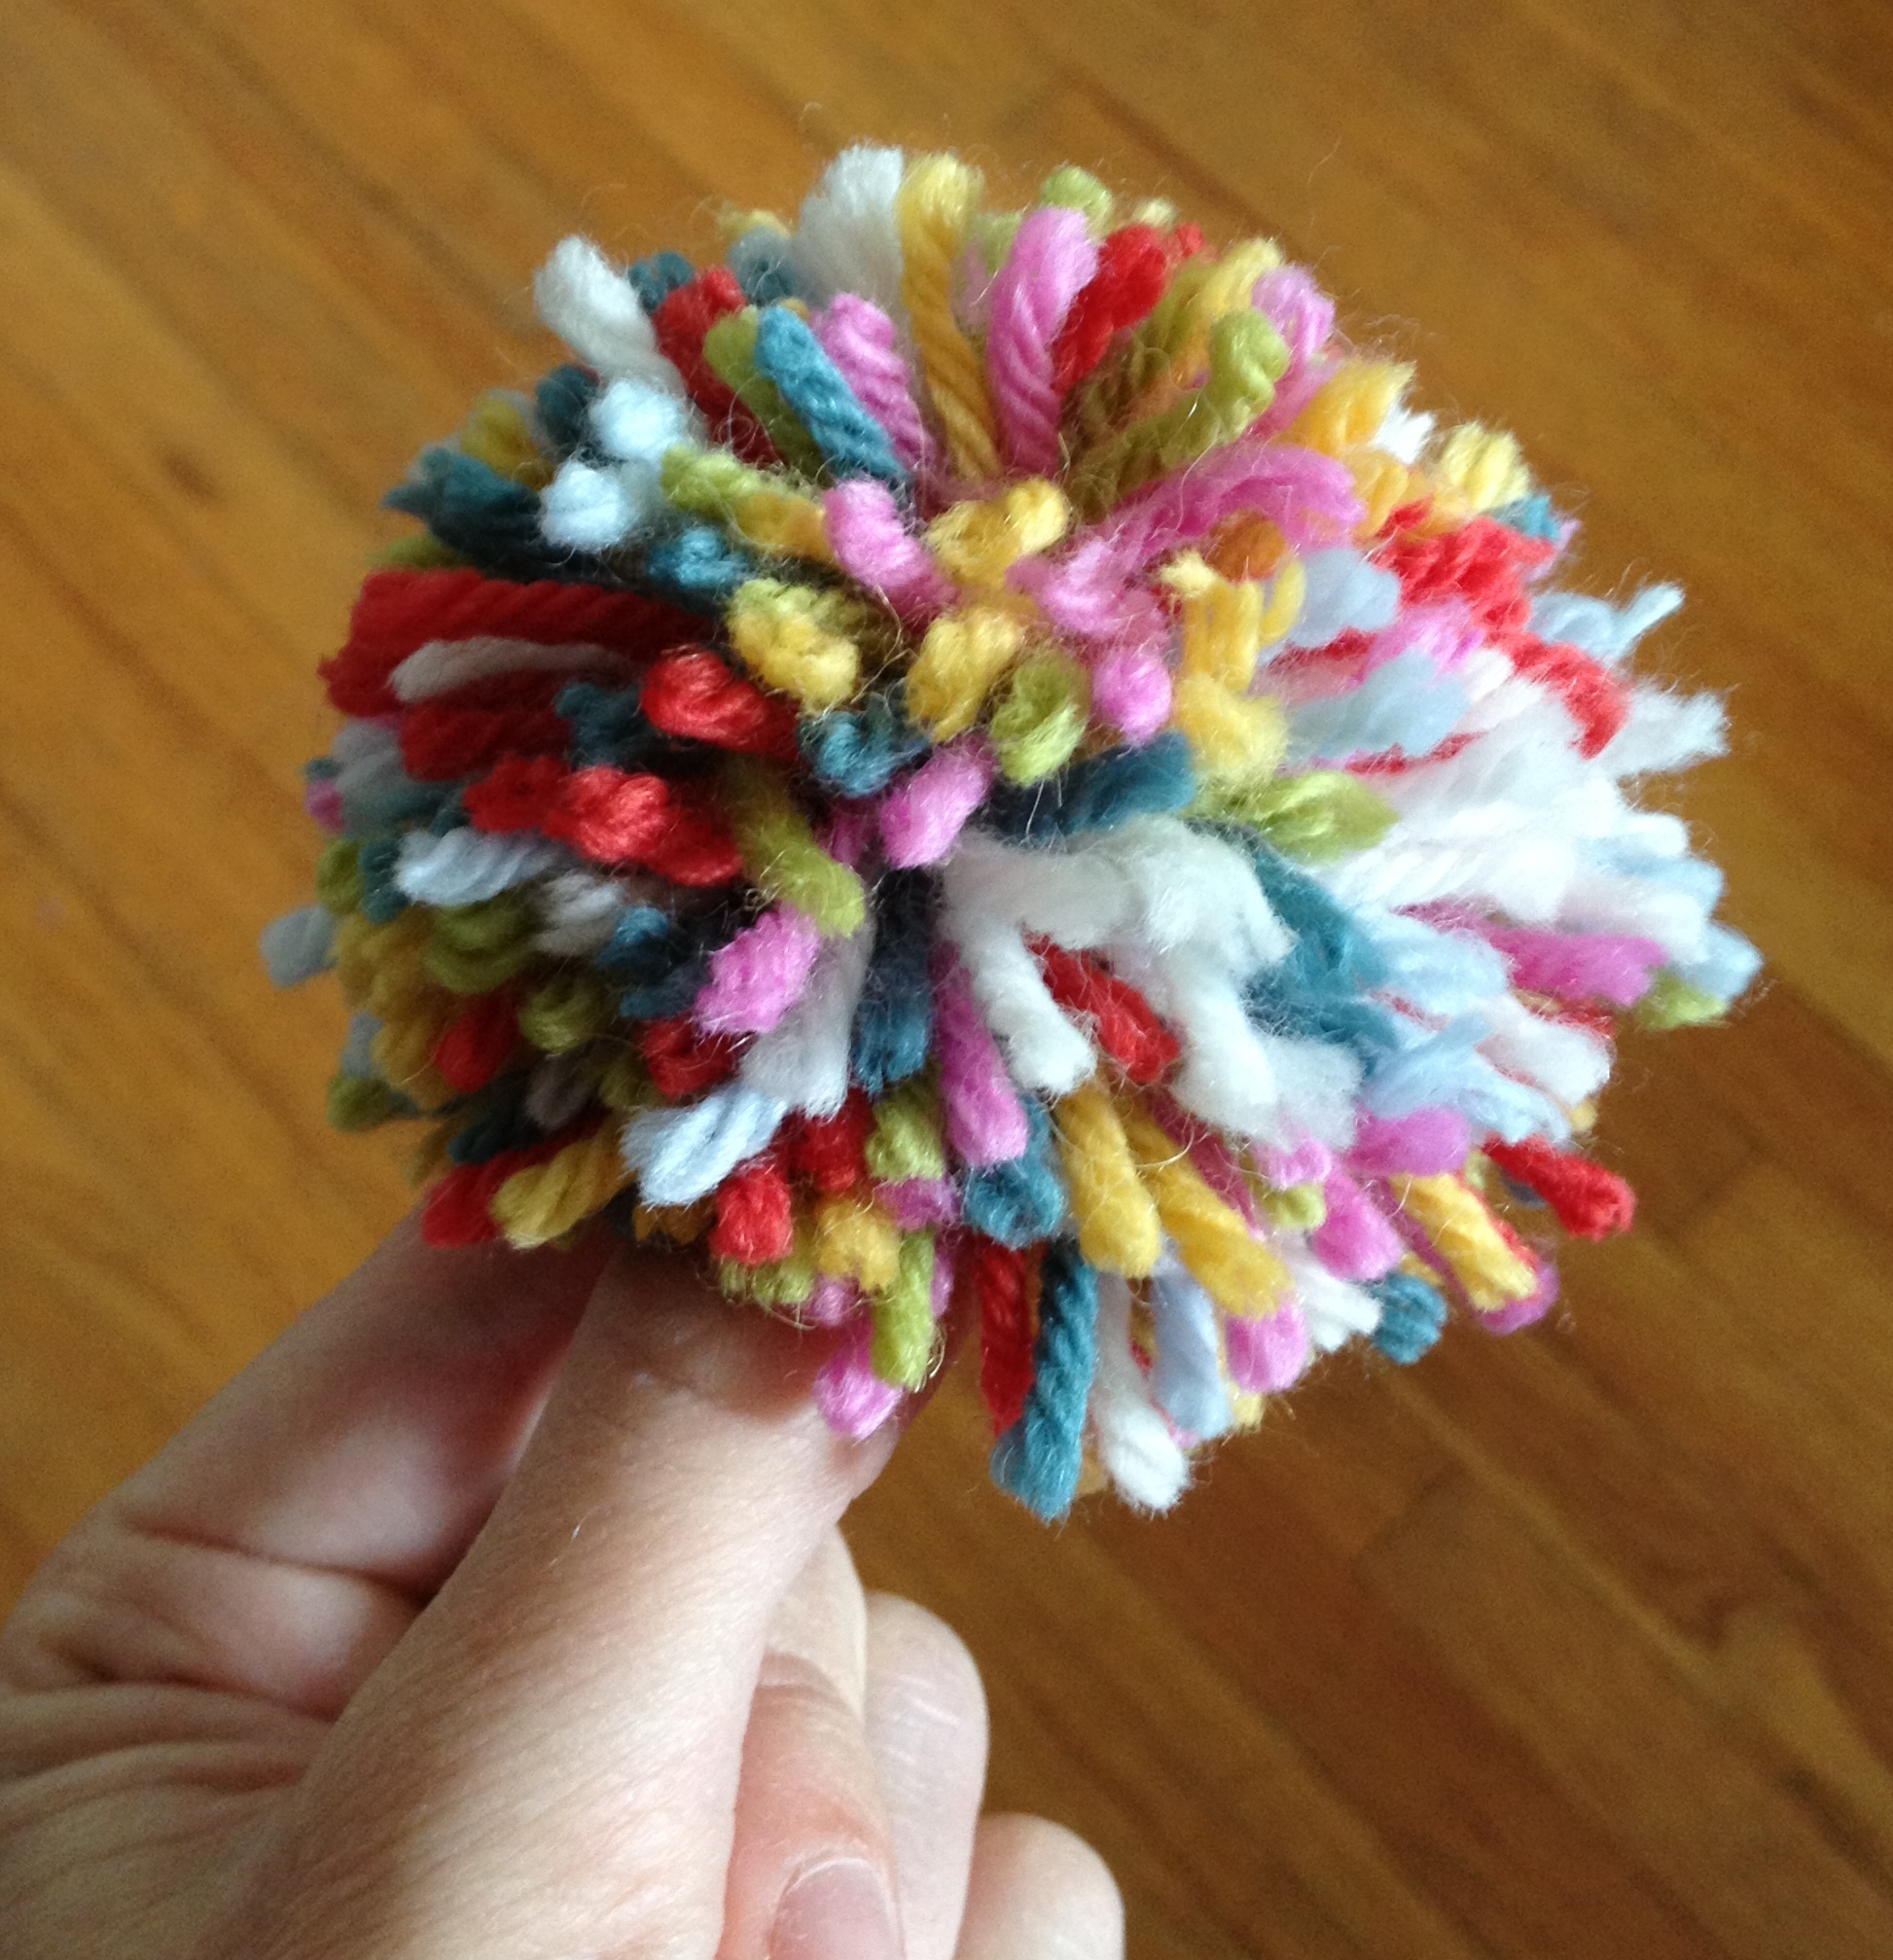
Give it a good fluff and then, using your scissors, give it a trim to make it a nice round ball. Using the long ends of the strand tied around the middle of the pompom, tie the pompom tightly to the top of the hat. Weave in the ends.
Good stuff, eh?

i am definitely making some for my daughters room…
LikeLike
Much easier than that faff with the rings for a small pompom.
LikeLike