I made crab apple jelly! In all my years of cooking and baking I have never once made preserves of any kind. Until today. I feel so relieved to have finally overcome my canning fears, it’s like a huge weight has been lifted from my shoulders. Okay, that’s a little melodramatic, but it really does feel quite satisfying.
Growing up, store-bought jam was a foreign concept, something to be withstood when dining out. My mom made strawberry jam every summer and it was the best stuff on earth. After I moved away from home my mom would still take care of my home-made jam needs. I’d get a jar at Christmas and any time I visited. Now I have the good fortune to receive blackberry jam from my mother-in-law as well.
But, like sewing, making preserves was something I felt I should know how to do. I even went as far as looking up a recipe and buying cheese cloth last year, only to chicken out at the last minute. Well this year, damn it, I made jelly! And now I’m going to share my experience with you.
Disclaimer: I am not a food stylist, nor do I own a fancy camera, so please bear with me on the photo front.
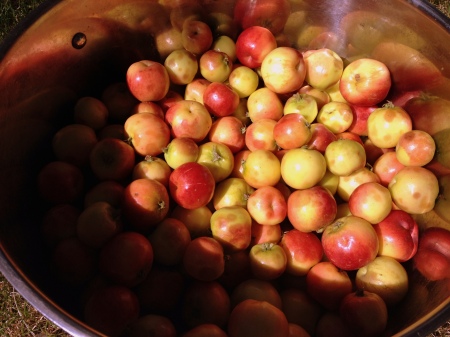
Step 1: Harvest 8 cups of crab apples. It is recommended that you do not allow your toddler to climb the ladder behind you as it could result in a fall… just sayin’.
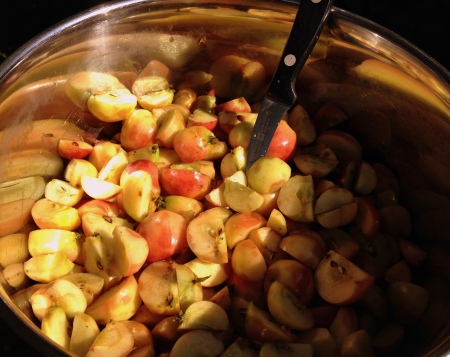
Step 2: Wash, de-stem and quarter the apples
Step 3: Cover apples with water until you can see it, but not so much that the apples are floating
Step 4: Bring the apples to a boil and simmer for 10 minutes until apples are soft (and your kitchen starts smelling yummy)
Step 5: Place a double layer of cheese cloth in a large bowl. Pour the stewed apples into the cheese cloth.
 Step 6: Gather the edges of the cheese cloth and tie with string (or non-minty dental floss if you don’t have string). Tie it to something that allows it to hang over the bowl and allow the juice to drip. I hung it from the handle on my cupboard door. Let sit for a few hours until it stops dripping.
Step 7: My recipe said I should have 4 cups of juice but I only ended up with about 3.5 cups. However much juice you have, place it back in the pot, bring to a boil and simmer for 10 minutes.
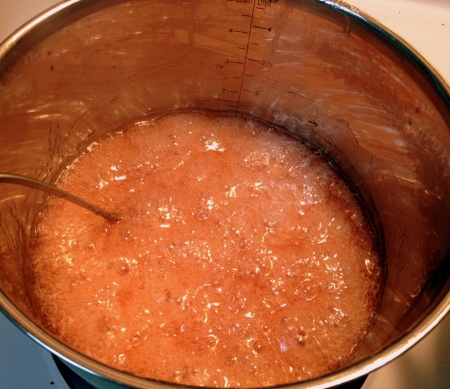
Step 8: Since I didn’t have the right amount of juice I winged it and adjusted the sugar accordingly. For 4 cups of juice I would have added 3 cups of sugar, but since I only had about 3.5 cups of juice I added a little less than 2.5 cups of sugar. Either way, add the sugar, stir until it dissolves and boil the mixture until it reaches between 220 and 222 degrees (since I’ve broken every candy thermometer I’ve ever owned, I used my digital meat thermometer instead). Skim off any foam that appears.
 Step 8.5: In the meantime, sterilize your bottles and lids by immersing them in boiling water for 10 minutes. I sterilized a bunch but only ended up needing 3, better safe than sorry though. I also sterilized the ends of my tongs so I could use those for handling the bottles.
 Step 9: When the jelly reaches the right temperature, remove from heat and pour into jars, leaving 1/4 inch head space.Tighten the lids really well. I had two full jars and one about a 1/3 full. The partial jar is for use over the next few weeks so I skipped step 10 for that one.
Step 10: Fully immerse jars in boiling water for 10 minutes to seal them.
 Step 11: And this is the best part. Take the jars out of the hot water bath and let them sit to cool. As the jars cool the lids will suck in and make this great “ping” noise which lets you know that the jars are properly sealed. That noise brings back some great memories of helping my mom make jam when I was little.
Recipe adapted from Mary Wynne’s Crabapple Jelly Recipe.
Thanks to Mom for answering all my questions!


Hey Kate,
Way to overcome your fear of making homemade jam!!! You’ve inspired to start making more homemade items 🙂
LikeLike
I made strawberry jam last year. I felt the same as you…that I had to overcome it, lol. It was one of the easiest things I’ve ever done! We didn’t get out picking this year so I’ll be raiding my mom’s freezer soon 🙂 Oh, I did beets last year too. That is the extent of my canning but I would love to try more.
LikeLike